Skip to main contentInstallation Instructions
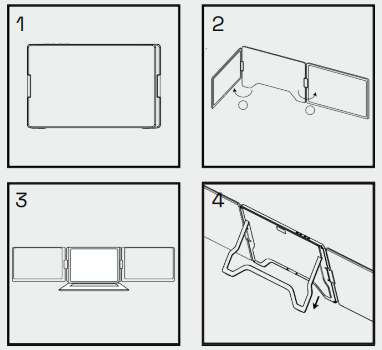
- Carefully remove the Screenmate from the packaging.
- Unfold the two screens as shown in Figure 2.
- Place the bracket firmly on a flat surface.
- The adjustable stand is located at the back of the Screenmate.
- Lift the stand and use the button to extend or retract it for extra stability.
- Connect the required cables: connect one end to the Screenmate and the other to your laptop.
Connection Options
Note: Make sure you use the correct USB-C port on your Screenmate.
 After driver installation, the Screenmate can be used with a single USB-C cable, provided the laptop delivers an output power of more than 10W.
Is the output power lower than 10W? Then additional power supply is needed for the Screenmate to function stably.
After driver installation, the Screenmate can be used with a single USB-C cable, provided the laptop delivers an output power of more than 10W.
Is the output power lower than 10W? Then additional power supply is needed for the Screenmate to function stably.
Using with 2 USB Cables
Note: Connect both USB-A cables to your laptop or to a suitable adapter.
Make sure to connect both cables to the laptop first, before connecting the other end to the Screenmate.
This prevents unstable power supply.
Or
Do you only have one USB port on your laptop?
Then connect the other USB cable to a power outlet.
Charging the Screenmate OneCable
When Screenmate is connected to an external power source, such as your laptop’s USB-C power adapter, and your laptop is connected via a USB-C port with Power Delivery, the reverse charging mode automatically activates.
This port can often be recognized by a charging or lightning symbol.
- Connect your laptop to Screenmate via a USB-C cable (with full functionality)
- Connect the USB-C power adapter to the Power port of Screenmate
Your laptop is now being charged via the Screenmate and the screen brightness is automatically optimized.
Note: Use a power adapter of at least 45W. No USB-C charger? Use a suitable power adapter.